It is curious that nobody voted Mac OS X as operating system favorite and also it is curious three people voted "Other". How would I like to known what is "other". Maybe Debian, Mint, FreeBSD, Fedora,OpenSUSE?
Showing posts with label Linux Ubuntu. Show all posts
Monday, January 2, 2012
What is your favorite operating system? - Results
On December 31st 2011, the poll "What is your favorite Operating System" closed! There was 14 votes to indicate the favorite operating system .
Labels:
Apple,
Debian,
Fedora,
FreeBSD,
Linux Ubuntu,
Microsoft Windows,
Mint,
OpenSUSE,
poll
Monday, November 14, 2011
Equivalent to ubuntu-restricted-extras for Debian
I installed Debian 6 on my 9 year old PC and I got a problem like I had with Ubuntu. It's about Youtube. I wanted to see a video but I couldn't because there was not adobe flash player installed.
For Ubuntu, I typed "sudo apt-get install ubuntu-restricted-extras". But I wanted a equivalent to ubuntu-restritected-extras for Debian.
So I googled and found out how to fix problems in Debian. In terminal, type the next commands:
For Ubuntu, I typed "sudo apt-get install ubuntu-restricted-extras". But I wanted a equivalent to ubuntu-restritected-extras for Debian.
So I googled and found out how to fix problems in Debian. In terminal, type the next commands:
- su -
- type root's password
- echo deb ftp:// ftp.debian-multimedia.org/ squeeze main >> /etc/apt/sources.list
- apt-get update
- apt-get install debian-multimedia-keyring
- type 'y'
And voilá! Now, you can see any video from Youtube or somewhere else.
Labels:
Debian,
Linux Ubuntu,
Ubuntu
Saturday, November 12, 2011
How to change from Unity to Gnome
Do you want to change from Unity to Gnome?
So type the next command or see this video:
- sudo apt-get install gnome-session-fallback
After the installation is completed, log out your session.
Then, before type your password, change from Ubuntu to Gnome Classic, after that, type your password.
Congratulations, you don't use Unity anymore.
Labels:
Gnome,
Linux Ubuntu,
Ubuntu,
Unity
Tuesday, November 8, 2011
How to install LDAP Server
Lightweight Directory Access Protocol (LDAP) is a network protocol for accessing and manipulating information stored in a directory.
Services built on the LDAP protocol are used to serve a wide range of information. The protocol is well-suited to serving information that must be highly available and accessible, but does not change frequently.
Common applications include:
- Centralization of user and group information as part of Single Sign On (SSO).
- Authenticate users in a web application.
- Create a shared address directory for mail agents.
- Authenticate users locally.
Well, I use LDAP to authenticate users in a web application for my work's project.
To install OpenLDAP on Ubuntu, type the next command in terminal or watch this video
- sudo apt-get install slapd ldap-utils;
- type your root's password;
- type 'y';
After the installation is completed, type "ldapsearch -Y EXTERNAL -H ldapi:// -b cn=config". This command should return 10-15 entries and is a good check to make sure the installation is basically functional.
In video, you can see 11 entries what means the installation is basically functional and also can follow the next steps:
- Type command "dpkg-reconfigure slapd";
- Choose 'No';
- Type any DNS domain name (e.g. sunsetsoftware.net);
- Type organization's name (e.g. Sunset Software);
- Type administrator's password of DNS domain name inserted on step #3;
- Confirm password inserted on step #5;
- Choose 'BDB' the database backend to use;
- Choose 'No';
- Choose 'Yes';
- Choose 'No';
- Type command "ldapsearch -x -b dc=sunsetsoftware,dc=net"
Now, you have to create a file ldif to populating database. I created a file called "xpto.ldif" and content is:
dn: ou=Group,dc=sunsetsoftware,dc=net
ou: Group
objectClass: organizationalUnit
Exit and save the file ldif on somewhere as you wish. Then, type the next command on terminal:
- ldapadd -x -W -D "cn=admin,dc=sunsetsoftware,dc=net" -f /home/peter/Documents/xpto.ldif
- Enter your ldap's password;
And, voilá! Congratulations! You already added new entry to tree dc=sunsetsoftware,dc=net. You can confirm or add more entries.
Labels:
LDAP,
Linux Ubuntu,
Sun Virtual Box,
Ubuntu
Saturday, October 22, 2011
How to install osCommerce
osCommerce (open source Commerce) is an e-commerce and can be used on web server that has PHP and MySQL installed. You can simply download on this site. After you download, you have to unzip and copy to a folder on web server.
The goal of this post is show you how to install osCommerce. I am installing on a virtual machine that works like a web server (LAMP) to simulate real scenario of installation osCommerce.
If you don't know install or configure a web server on Ubuntu, please read this post or see this video.
If you already installed LAMP, please following the next steps to install:
The goal of this post is show you how to install osCommerce. I am installing on a virtual machine that works like a web server (LAMP) to simulate real scenario of installation osCommerce.
If you don't know install or configure a web server on Ubuntu, please read this post or see this video.
If you already installed LAMP, please following the next steps to install:
- Go to this site and download "oscommerce-2.3.1.zip";
- Unzip "oscommerce-2.3.1.zip";
- Copy to web server ;
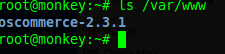
- Check out the copy;
- Modify the permissions on specific folders;
- After modifying the permissions, will show up the next screen. Press the button "Continue";
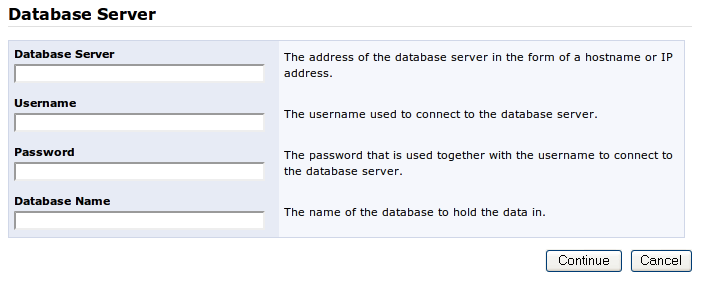
- It will show up a form where you have fill with right values. But I didn't create a database yet. For that, I went to terminal and typed "mysql -h localhost -u root -p" to login MySQL Server. And then, I created database called "oscommerce" with next command: "create schema oscommerce". Finish! Now you can fill form like you can see in third image.
Note: I made a mistake to input "192.168.1.199" instead a right IP address which is localhost or 127.0.0.1.
- I agreed with those values by default. If you want to change, you are comfortable to change.
- The next form is about your online store. You have to give information like your online store name, owner name, owner email address, administrator username and administrator password.
- Please read the post-installation notes. It is very important follow the steps to finish the installation.
- The next image will demonstrate you how to set permissions on step #3 and #4 according the previous image.
- Then, type in your browser: http://localhost/oscommerce/catalog/admin. This address will drive at administrator page where you have insert administrator username and password.
- Follow the path Administration Tool -> Tools -> Security Directory Permissions. This page will list permissions that you have change to with command "chmod 777 ..." like you can see in first image. After you changed permissions, press F5 to reload page to see values changed. Finish! You already finished the part of administration. Now let see the online store.
- Type "http://localhost/oscommerce-2.3.1/catalog/" and press Enter. Voilá! Congratulations! You installed your online store!
| Step #3 |
![]() |
| Step #4 |
![]() |
| Step #5 |
![]() |
| Step #5 |
![]() |
| Step #6 |
![]() |
| Step #7 |
![]() |
| Step #7 |
![]() |
| Step #7 |
![]() |
| Step #8 |
![]() |
| Step #9 |
![]() |
| Step #10 |
![]() |
| Step #11 |
![]() |
| Step #12 |
![]() |
| Step #13 |
![]() |
| Step #13 |
![]() |
| Step #14 |
And now you can do anything with your online store and sell anything. Good luck for your sales!
Labels:
Apache,
LAMP,
Linux Ubuntu,
MySQL,
OSCommerce,
PHP,
phpmyadmin,
Sun Virtual Box,
Ubuntu
Monday, May 30, 2011
First command after install Linux Ubuntu
Hi, I was very busy in this month. I created a new virtual machine (Sun Virtual Box) which has Linux Ubuntu installed. I didn't want install one by one the package necessary for correct working of operating system Linux Ubuntu. After I researched in World Wide Web, I found out a command that allows me install in a single line.
sudo apt-get install ubuntu-restricted-extras
Labels:
command,
Linux Ubuntu,
Sun Virtual Box
Tuesday, April 12, 2011
How to configure snmpd
Continuing the installation of Cacti, you need do some configuration on another machines. Without doing this configuration, an error message will show up when you try create a device. Please click on this link to see how to do.
Friday, April 8, 2011
How to install Cacti
Cacti has some prerequisites. You need to install these packages before install Cacti:
Apache
Open a terminal and follow the next steps:
PHP
Now that your web server is ready, we will install PHP. Open a terminal and follow the next steps:
Enter the following command:
Net-SNMP
Open terminal and type the following commands:
RRDTool is available in the Debian repository, so you can install it through APT. Type in your terminal
Before continuing, be sure that you got no error previously. You are in the last step of installing Cacti.
- RRDTool;
- NET-SNMP;
- MySQL;
- PHP;
- Apache;
Apache
Open a terminal and follow the next steps:
- sudo apt-get install apache2
PHP
Now that your web server is ready, we will install PHP. Open a terminal and follow the next steps:
- sudo apt-get install php5 libapache2-mod-php5
- sudo /etc/init.d/apache2 restart
- sudo gedit
- write the following PHP code:
- <?php phpinfo();?>
- save file as info.php in /var/www folder
- open your favorite browser and type http://localhost/info.php.
Enter the following command:
- sudo apt-get install mysql-server-5.0 php5-mysql
- type your password (e.g.: root)
- sudo /etc/init.d/apache2 restart
- open http://localhost/info.php in your favorite browser and check MySQL module.
Net-SNMP
Open terminal and type the following commands:
- sudo apt-get install snmp php5-snmp
- sudo /etc/init.d/apache2 restart
- Open http://localhost/info.php in your favorite browser and check SNMP module
RRDTool is available in the Debian repository, so you can install it through APT. Type in your terminal
- sudo apt-get install rrdtool
Before continuing, be sure that you got no error previously. You are in the last step of installing Cacti.
- sudo apt-get install cacti
- select option 'apache2'
- type your password of the database's administrative user (e.g.: root)
- type your MySQL application password for cacti and retype in password confirmation (e.g.: root)
- To complete the configuration process, open http://localhost/cacti in your favorite browser.
In the installation type page, you can select if it's new install or an upgrade. As we are going to install it for the first time, we will select New Install (which is selected by default) and click Next. The path settings page automatically determines the installed paths for RRDTool, PHP, SNMP and Cacti.log as well as the versions for Net-SNMP and RRDTool and then click Next.
In login screen, the username is admin and the default password is admin. After a successful login for the first time, the system will ask you to set a new password. Enter a new password and ensure you remember it. Without this password, you cannot administer the system!
Friday, April 1, 2011
How to install plugin PHP in Netbeans
A month ago, I installed NetBeans trough Linux Ubuntu's terminal with following command: sudo apt-get install netbeans. After the instalation is completed, I noticed that I can't create PHP project. So I was searching on Net and I found out how to solve the problem. In Netbeans, was missing plugin PHP. To see how to install plugin PHP, please click this link.
Labels:
Linux Ubuntu,
Netbeans,
PHP,
plugin
Saturday, March 12, 2011
RAR
Today I was working in my project in Linux Ubuntu. I wanted extract folder to specific location and I could not because there was unable to extract.
I clicked in mouse's right button and then selected option 'Extract here' and show up the error message.
To extract name_folder.rar, follow the next steps:
I clicked in mouse's right button and then selected option 'Extract here' and show up the error message.
To extract name_folder.rar, follow the next steps:
- Type 'sudo apt-get install unrar' in Terminal
- Go to folder that you want extract and with mouse's right button select option 'Extract here'
- Congratulations, you can extract with success!
Labels:
Linux Ubuntu,
rar,
unrar
PHP5, MySQL and APACHE
I created a web application (PHP) that show the data stored in MySQL's database.
The materials needed are:
PHP, MySQL and Apache
Clicking this link (video) that can show how to install php, mysql and apache or following the next steps:
The materials needed are:
PHP, MySQL and Apache
Clicking this link (video) that can show how to install php, mysql and apache or following the next steps:
- Type 'sudo apt-get install mysql-server mysql-client;'
- Type 'y' when appears the question to install;
- Note: you have type password to user root.
- After the installation is finished, type 'sudo apt-get install php5' (in my case, apache was selected to install automatically)
- Type 'y' when appears the question to install;
- To check out if the web server apache is working, go to any browser and type 'http://localhost' in address bar;
- If web server apache is not working, type 'sudo apt-get install apache2'
- Type 'y' to install apache2 web server;
- Congratulations, you finished the installation with success!
Labels:
Apache,
Linux Ubuntu,
MySQL,
PHP
Subscribe to:
Posts (Atom)