Showing posts with label Ubuntu. Show all posts

Monday, March 11, 2013

Commands Vi/Vim editor

As system administrator, I have needed to edit configuration files of some services such as DNS (Domain Name System), LDAP (Lightweight Directory Access Protcol) and etc.

The editor I was using frequently was nano and rarely I used pico. All those editors were used on Ubuntu. When I decided to fit in CentOS, I noticed that I had to install package nano. But I did not want to! I wanted to vary and then I searched and found editor Vi (also it is equal to Vim, although Vim has more features than Vi). I confess, at first time, it was very confused. I did not know what commands to edit file and much less how to save the changes and exit. So I googled and found some commands useful to edit files.

Hereafter, you will see a list of commands to Vi/Vim editor:

CommandDescription
:wqSave the file and exit
:wSave the file
:qQuit and Vi/Vim refuses to exit if any changes was made
:!qQuit without changes to save
:aAppend after cursor
:iInsert after cursor
ESCExit insert/overwrite mode and go back to command mode

Wednesday, November 7, 2012

How to check Ubuntu version using command line

I wanted to see what was my Ubuntu version using command line. After I found this website, I could to see my Ubuntu version.

To check your Ubuntu version using command line:
  1. Open terminal (CTRL+ALT+T)
  2. Type lsb_release -a and press Enter
  3. The Ubuntu version will displayed on the screen

At the time, my Ubuntu version is Ubuntu 11.10 (oneiric).

Wednesday, October 17, 2012

How to change timezone on Apache Webserver

My Apache Webserver had not timezone correct. If I wanted timezone correct, I had to do some configuration on Apache Webserver. But how to do this?

To change timezone on my Apache Webserver, I followed the next steps:
  1. Type sudo nano /etc/php5/apache2/php.ini;
  2. Search for "date.timezone" and modify to "date.timezone="Europe/London" or to your timezone;
  3. Save the file and exit using CTRL+X;
  4. Type sudo /etc/init.d/apache2 restart

To see what is your timezone, check this website

At the moment, my operating system was Ubuntu 11.10 and Apache Webserver was 2.2.20!

Wednesday, August 8, 2012

How to install Samba

Since 1992, Samba is an open-source software that your main goal is to remove the barriers of interoperability between different operating systems.

I need Samba to move files from Windows to Ubuntu and vice-versa for work's issues. Hereafter, you can see the steps how to install Samba:

  1. sudo apt-get install samba samba-tools
  2. sudo smbpasswd -a yourusername
    • Type your password
    • Retype your password
  3. mkdir /srv/samba/share
  4. sudo nano /etc/samba/smb.conf
  5. Press Ctrl+W
    • Search for: #security=user
    • remove '#' (from "#security=user" to "security=user")
  6. On bottom of file write the next statements:
  7. [share]
    path = /srv/samba/share
    comment = some random files
    available = yes
    valid users = yourusername
    read only = no
    
  8. sudo restart smbd
  9. testparm /etc/samba/smb.conf

Note: After you typed the last command and got errors message, you have to fix it. But I am 100% sure, it will not show up a error message unless you mistyped some statements.

Monday, November 14, 2011

Equivalent to ubuntu-restricted-extras for Debian

I installed Debian 6 on my 9 year old PC and I got a problem like I had with Ubuntu. It's about Youtube. I wanted to see a video but I couldn't because there was not adobe flash player installed.
For Ubuntu, I typed "sudo apt-get install ubuntu-restricted-extras". But I wanted a equivalent to ubuntu-restritected-extras for Debian.
So I googled and found out how to fix problems in Debian. In terminal, type the next commands:

  1. su -
  2. type root's password
  3. echo deb ftp:// ftp.debian-multimedia.org/ squeeze main >> /etc/apt/sources.list
  4. apt-get update
  5. apt-get install debian-multimedia-keyring
  6. type 'y'
And voilá! Now, you can see any video from Youtube or somewhere else.

Saturday, November 12, 2011

How to change from Unity to Gnome

Do you want to change from Unity to Gnome?

So type the next command or see this video:
  • sudo apt-get install gnome-session-fallback
After the installation is completed, log out your session.

Then, before type your password, change from Ubuntu to Gnome Classic, after that, type your password.

Congratulations, you don't use Unity anymore. 

Tuesday, November 8, 2011

How to install LDAP Server


Lightweight Directory Access Protocol (LDAP) is a network protocol for accessing and manipulating information stored in a directory.
Services built on the LDAP protocol are used to serve a wide range of information. The protocol is well-suited to serving information that must be highly available and accessible, but does not change frequently. 
Common applications include:
  1. Centralization of user and group information as part of Single Sign On (SSO).
  2. Authenticate users in a web application.
  3. Create a shared address directory for mail agents.
  4. Authenticate users locally.


Well, I use LDAP to authenticate users in a web application for my work's project.


To install OpenLDAP on Ubuntu, type the next command in terminal or watch this video


  1. sudo apt-get install slapd ldap-utils;
  2. type your root's password;
  3. type 'y';
After the installation is completed, type "ldapsearch -Y EXTERNAL -H ldapi:// -b cn=config". This command should return 10-15 entries and is a good check to make sure the installation is basically functional.
In video, you can see 11 entries what means the installation is basically functional and also can follow the next steps:


  1. Type command "dpkg-reconfigure slapd";
  2. Choose 'No';
  3. Type any DNS domain name (e.g. sunsetsoftware.net);
  4. Type organization's name (e.g. Sunset Software);
  5. Type administrator's password of DNS domain name inserted on step #3;
  6. Confirm password inserted on step #5;
  7. Choose 'BDB' the database backend to use;
  8. Choose 'No';
  9. Choose 'Yes';
  10. Choose 'No';
  11. Type command "ldapsearch -x -b dc=sunsetsoftware,dc=net"
Now, you have to create a file ldif to populating database. I created a file called "xpto.ldif" and content is:

dn: ou=Group,dc=sunsetsoftware,dc=net
ou: Group
objectClass: organizationalUnit

Exit and save the file ldif on somewhere as you wish. Then, type the next command on terminal:
  • ldapadd -x -W -D "cn=admin,dc=sunsetsoftware,dc=net" -f /home/peter/Documents/xpto.ldif
  • Enter your ldap's password;
And, voilá! Congratulations! You already added new entry to tree dc=sunsetsoftware,dc=net. You can confirm or add more entries. 


Saturday, October 22, 2011

How to install osCommerce

osCommerce (open source Commerce) is an e-commerce and can be used on web server that has PHP and MySQL installed. You can simply download on this site. After you download, you have to unzip and copy to a folder on web server.

The goal of this post is show you how to install osCommerce. I am installing on a virtual machine that works like a web server (LAMP) to simulate real scenario of installation osCommerce.

If you don't know install or configure a web server on Ubuntu, please read this post or see this video.

If you already installed LAMP, please following the next steps to install:


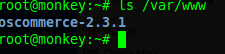
  1. Go to this site and download "oscommerce-2.3.1.zip";
  2. Unzip "oscommerce-2.3.1.zip";
  3. Copy to web server ;
  4. Step #3

  5. Check out the copy;
  6. Step #4

  7. Modify the permissions on specific folders;
  8. Step #5

    Step #5

  9. After modifying the permissions, will show up  the next screen. Press the button "Continue";
  10. Step #6

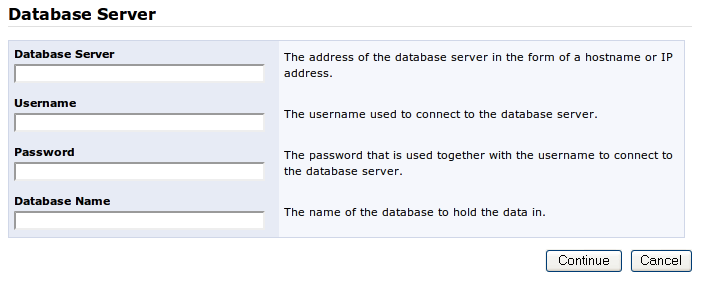
  11. It will show up a form where you have fill with right values. But I didn't create a database yet. For that, I went to terminal and typed "mysql -h localhost -u root -p" to login MySQL Server. And then, I created database called "oscommerce" with next command: "create schema oscommerce". Finish! Now you can fill form like you can see in third image.

    Note: I made a mistake to input "192.168.1.199" instead a right IP address which is localhost or 127.0.0.1.

  12. Step #7

    Step #7

    Step #7

  13. I agreed with those values by default. If you want to change, you are comfortable to change.
  14. Step #8

  15. The next form is about your online store. You have to give information like your online store name, owner name, owner email address, administrator username and administrator password.
  16. Step #9

  17. Please read the post-installation notes. It is very important follow the steps to finish the installation.
  18. Step #10

  19. The next image will demonstrate you how to set permissions on step #3 and #4 according the previous image.
  20. Step #11

  21. Then, type in your browser: http://localhost/oscommerce/catalog/admin. This address will drive at administrator page where you have insert administrator username and password.
  22. Step #12

  23. Follow the path Administration Tool -> Tools -> Security Directory Permissions. This page will list permissions that you have change to with command "chmod 777 ..." like you can see in first image. After you changed permissions, press F5 to reload page to see values changed. Finish! You already finished the part of administration. Now let see the online store.
  24. Step #13

    Step #13

  25. Type "http://localhost/oscommerce-2.3.1/catalog/" and press Enter. Voilá! Congratulations! You installed your online store!
  26. Step #14


And now you can do anything with your online store and sell anything. Good luck for your sales!


Tuesday, October 4, 2011

Ubuntu vs OpenSUSE vs Fedora

In past few weeks, I upgraded my 9 years old PC. I bought a Ethernet card, 1GB memory RAM and 160GB Hard Drive IDE/ATA to upgrade my old PC.

My question was what operating system I will install to my 9 years old PC. I was undecided between Ubuntu and OpenSUSE. So I researched more deep, and I found out a site who helped me a lot.


I had two choices: OpenSUSE or Fedora. To my surprise, Ubuntu had 90% of recommendation. So I ignored Ubuntu and I tried OpenSUSE and Fedora with LiveCD. After I experimented both, I decided to install OpenSUSE.