Tuesday, November 8, 2011

How to install LDAP Server


Lightweight Directory Access Protocol (LDAP) is a network protocol for accessing and manipulating information stored in a directory.
Services built on the LDAP protocol are used to serve a wide range of information. The protocol is well-suited to serving information that must be highly available and accessible, but does not change frequently. 
Common applications include:
  1. Centralization of user and group information as part of Single Sign On (SSO).
  2. Authenticate users in a web application.
  3. Create a shared address directory for mail agents.
  4. Authenticate users locally.


Well, I use LDAP to authenticate users in a web application for my work's project.


To install OpenLDAP on Ubuntu, type the next command in terminal or watch this video


  1. sudo apt-get install slapd ldap-utils;
  2. type your root's password;
  3. type 'y';
After the installation is completed, type "ldapsearch -Y EXTERNAL -H ldapi:// -b cn=config". This command should return 10-15 entries and is a good check to make sure the installation is basically functional.
In video, you can see 11 entries what means the installation is basically functional and also can follow the next steps:


  1. Type command "dpkg-reconfigure slapd";
  2. Choose 'No';
  3. Type any DNS domain name (e.g. sunsetsoftware.net);
  4. Type organization's name (e.g. Sunset Software);
  5. Type administrator's password of DNS domain name inserted on step #3;
  6. Confirm password inserted on step #5;
  7. Choose 'BDB' the database backend to use;
  8. Choose 'No';
  9. Choose 'Yes';
  10. Choose 'No';
  11. Type command "ldapsearch -x -b dc=sunsetsoftware,dc=net"
Now, you have to create a file ldif to populating database. I created a file called "xpto.ldif" and content is:

dn: ou=Group,dc=sunsetsoftware,dc=net
ou: Group
objectClass: organizationalUnit

Exit and save the file ldif on somewhere as you wish. Then, type the next command on terminal:
  • ldapadd -x -W -D "cn=admin,dc=sunsetsoftware,dc=net" -f /home/peter/Documents/xpto.ldif
  • Enter your ldap's password;
And, voilá! Congratulations! You already added new entry to tree dc=sunsetsoftware,dc=net. You can confirm or add more entries. 


Monday, October 31, 2011

Convert dates in PHP and MySQL

Today I was working in project and I was confronted by one problem. As I live in Europe, the date's format are not the same in United States even MySQL. US use mm/dd/yyyy format, Europe use dd/mm/yyyy and MySQL use yyyy-mm-dd.


After I researched on PHP and MySQL official sites, I wrote algorithms that allowed me insert correctly data in SQL. 


PHP to MySQL:


SQL:


create schema test;


create tabela xpto(
id int not null auto_increment,
start_date date,
end_date date,
primary key(id)
)engine=innodb;


PHP:
<?php
$start_date = "10/10/2011";
$end_date = "12/10/2011";


$query0 = "select str_to_date('$start_date','%d/%m/%Y')";
$result0 = mysql_query($query0) or die(mysql_error());
$row0 = mysql_fetch_array($result0);


$query1 = "select str_to_date('$end_date','%d/%m/%Y')";
$result1 = mysql_query($query1) or die(mysql_error());
$row1 = mysql_fetch_array($result1);


$query2 = "insert into xpto (start_date, end_date) values ('".$row0[0]."','".$row1[0]."')";
$result2 = mysql_query($query2) or die(mysql_error());
?>


To check out the data inserted, type on mysql terminal:
select * from xpto;


MySQL to PHP:
It is enough select data stored and use two functions to show date format correctly.


PHP:
<?php
mysql_connect("localhost","user","pass") or die (mysql_error());
mysql_select_db("test");


$query0="select start_date from xpto where id=1";
$result0 = mysql_query($query0) or die (mysql_error());
$row0 = mysql_fetch_array($result0,MYSQL_NUM);


$query1="select end_date from xpto where id=1";
$result1 = mysql_query($query1) or die (mysql_error());
$row1 = mysql_fetch_array($result1,MYSQL_NUM);


$start_date=$row0[0];//"2011-10-10"
$end_date=$row1[0];//"2011-10-12"


$d0 = strtotime($start_date);
$d1 = date('d/m/Y',$d0);
echo $d1."<br />";


$d2 = strtotime($end_date);
$d3 = date('d/m/Y',$d2);
echo $d3."<br />";
?>


Happy Halloween! :)

Saturday, October 22, 2011

How to install osCommerce

osCommerce (open source Commerce) is an e-commerce and can be used on web server that has PHP and MySQL installed. You can simply download on this site. After you download, you have to unzip and copy to a folder on web server.

The goal of this post is show you how to install osCommerce. I am installing on a virtual machine that works like a web server (LAMP) to simulate real scenario of installation osCommerce.

If you don't know install or configure a web server on Ubuntu, please read this post or see this video.

If you already installed LAMP, please following the next steps to install:


  1. Go to this site and download "oscommerce-2.3.1.zip";
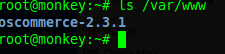
  2. Unzip "oscommerce-2.3.1.zip";
  3. Copy to web server ;
  4. Step #3

  5. Check out the copy;
  6. Step #4

  7. Modify the permissions on specific folders;
  8. Step #5

    Step #5

  9. After modifying the permissions, will show up  the next screen. Press the button "Continue";
  10. Step #6

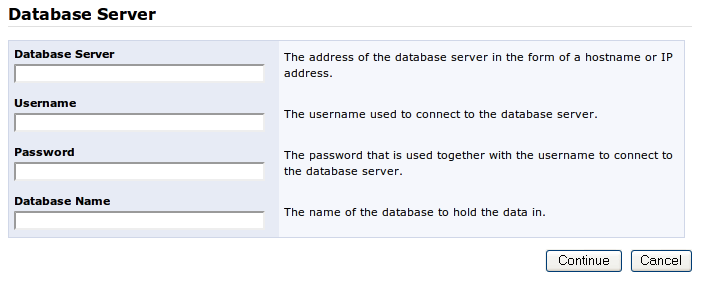
  11. It will show up a form where you have fill with right values. But I didn't create a database yet. For that, I went to terminal and typed "mysql -h localhost -u root -p" to login MySQL Server. And then, I created database called "oscommerce" with next command: "create schema oscommerce". Finish! Now you can fill form like you can see in third image.

    Note: I made a mistake to input "192.168.1.199" instead a right IP address which is localhost or 127.0.0.1.

  12. Step #7

    Step #7

    Step #7

  13. I agreed with those values by default. If you want to change, you are comfortable to change.
  14. Step #8

  15. The next form is about your online store. You have to give information like your online store name, owner name, owner email address, administrator username and administrator password.
  16. Step #9

  17. Please read the post-installation notes. It is very important follow the steps to finish the installation.
  18. Step #10

  19. The next image will demonstrate you how to set permissions on step #3 and #4 according the previous image.
  20. Step #11

  21. Then, type in your browser: http://localhost/oscommerce/catalog/admin. This address will drive at administrator page where you have insert administrator username and password.
  22. Step #12

  23. Follow the path Administration Tool -> Tools -> Security Directory Permissions. This page will list permissions that you have change to with command "chmod 777 ..." like you can see in first image. After you changed permissions, press F5 to reload page to see values changed. Finish! You already finished the part of administration. Now let see the online store.
  24. Step #13

    Step #13

  25. Type "http://localhost/oscommerce-2.3.1/catalog/" and press Enter. Voilá! Congratulations! You installed your online store!
  26. Step #14


And now you can do anything with your online store and sell anything. Good luck for your sales!


Friday, October 14, 2011

Gliffy

Today I found out a great, great application to modeling data. I am working to create information system to company where I work. And I need a software where I am able to drawing data model. I went to Google and tried Gliffy. Gliffy is absolutely amazing. Much better than Microsoft Visio, no offense Microsoft.
For who work with Microsoft Visio, always can drawing and exporting diagram in SVG.

Thursday, October 13, 2011

Dennis Ritchie


Thank your for C and Unix!

RIP 

(1941-2011)